Walkthrough: a Let's Encrypt certificate with GoDaddy DNS
From nothing to an issued certificate in a few minutes. Let's Encrypt issues the certificate; GoDaddy only hosts your DNS. NeverLapse proves you own the domain by adding a temporary TXT record through GoDaddy's API, removes it again afterwards, and renews the certificate on its own from then on.
Before you start
- NeverLapse Cert installed and signed in. See Download and install and First sign-in.
- The domain's DNS is hosted at GoDaddy, meaning its name servers are GoDaddy's (
nsXX.domaincontrol.com). Registering the domain at GoDaddy isn't enough if its DNS is hosted somewhere else. - A sign-in to the GoDaddy account that owns the domain, to create an API token.
- Nothing to set up for Let's Encrypt: NeverLapse has it built in and creates the Let's Encrypt account by itself on the first certificate.
- The certificate's name doesn't have to point anywhere. Validation happens through DNS, so you can issue a certificate for a server that isn't public, or isn't built yet.
1. Create a GoDaddy API token
NeverLapse talks to GoDaddy with a Personal Access Token. GoDaddy's newer DNS API uses this one token instead of the old API key and secret pair.
- Sign in to GoDaddy's developer site (developer.godaddy.com) with the account that owns the domain, and open the Personal Access Token page.
- Click Generate Token. Give it a name you'll recognise (for example
NeverLapse), an expiration date, and the scopesdomains.dns:updateanddomains.domain:read(or the whole Domains & DNS group). - Copy the token. GoDaddy shows it only once. It starts with
gd_pat_.
2. Add the certificate
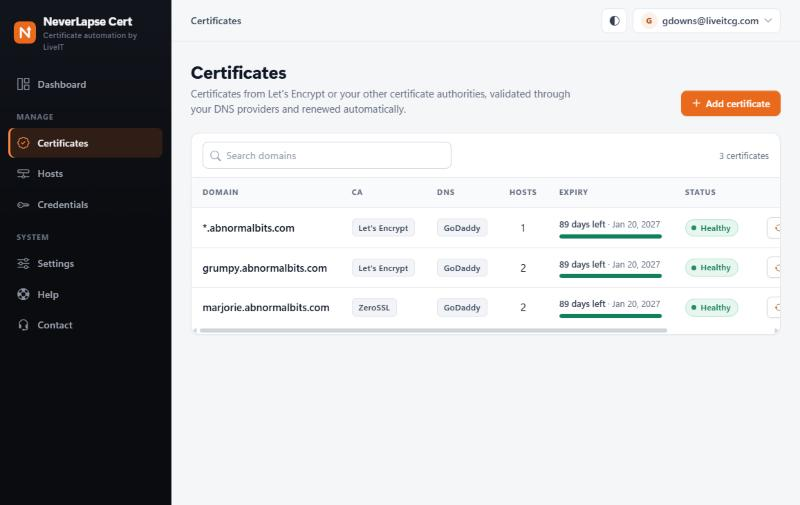
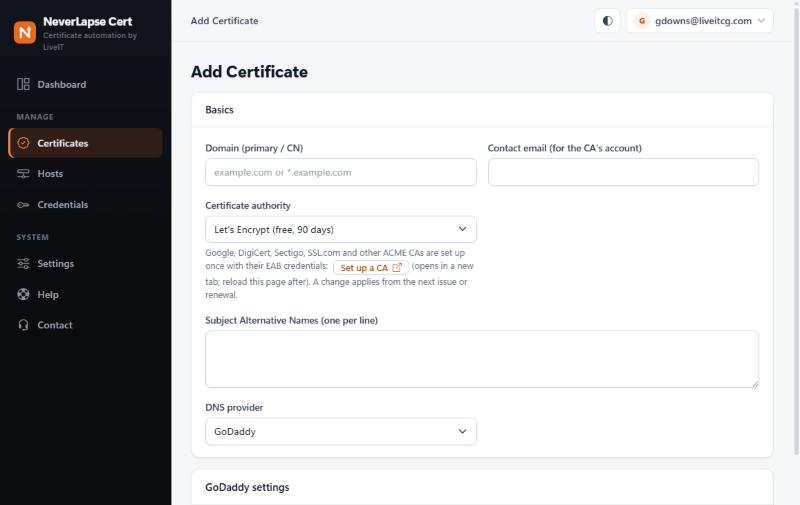
In NeverLapse, open Certificates and click Add certificate.
3. Fill in the basics
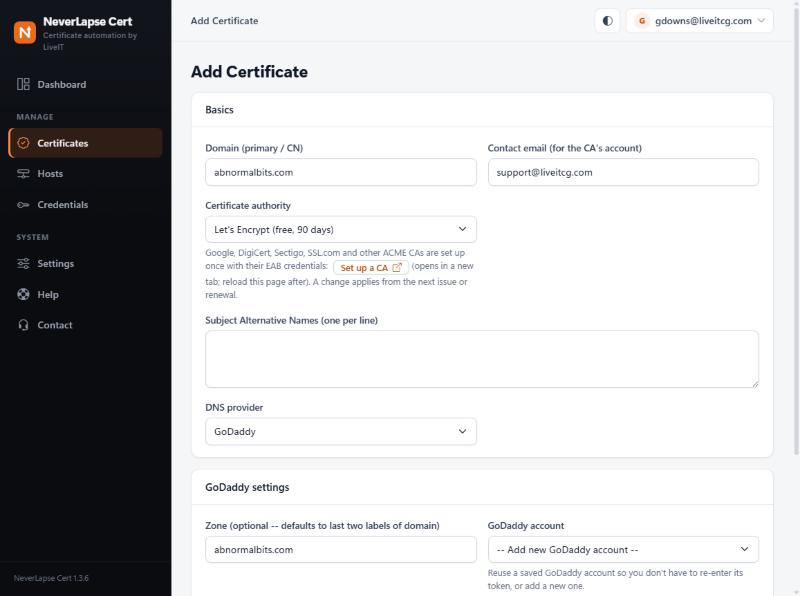
- Domain (primary / CN): the name the certificate is for, here
abnormalbits.com. For a wildcard, type*.example.com. - Contact email: Let's Encrypt uses it for its account. Use a mailbox your team reads.
- Certificate authority: leave it on Let's Encrypt (free, 90 days).
- Subject Alternative Names (optional): more names for the same certificate, one per line, for example
www.example.com. Every name must be in a zone this GoDaddy account can change. - DNS provider: GoDaddy.
4. Connect GoDaddy
Under GoDaddy settings:
- Zone: the domain as it appears in GoDaddy's DNS, here
abnormalbits.com. You can leave it blank; NeverLapse then uses the last two parts of the name (app.example.combecomesexample.com). Fill it in for names likeexample.co.uk. - GoDaddy account: leave Add new GoDaddy account the first time.
- New account name: a label so you can pick this account again for other certificates, for example
GoDaddy - example.com. - Personal Access Token: paste the token from step 1. It shows as dots.
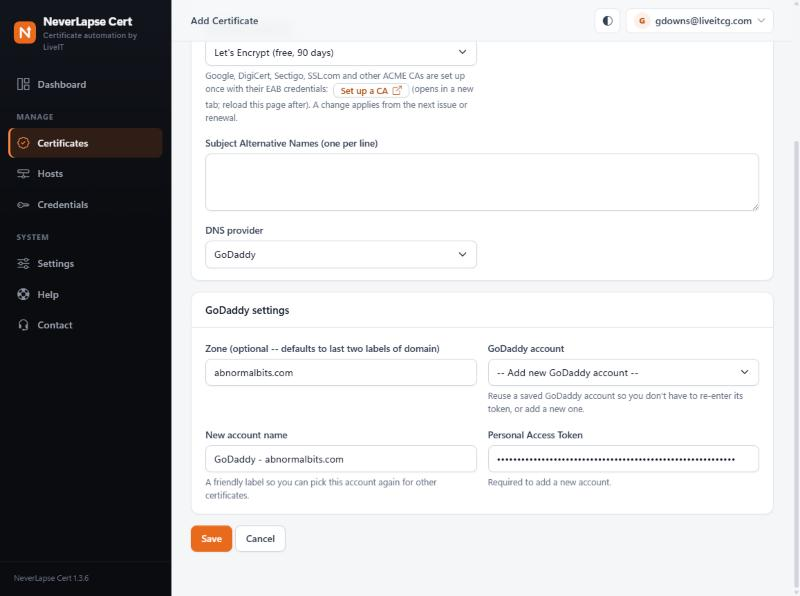
Click Save. The certificate is added with the status Not issued. Saving doesn't contact Let's Encrypt or GoDaddy yet.
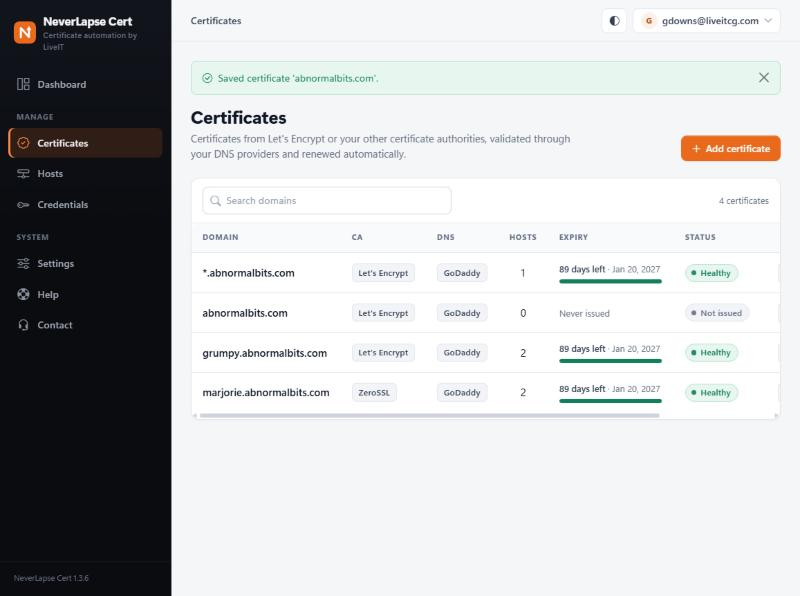
Next time you add a certificate in a zone this GoDaddy account manages, pick the saved account under GoDaddy account instead of pasting the token again.
5. Issue it
On the certificate's row, click Issue now; a window shows each step as it happens. The work runs in the background, so you can close the window and come back with View progress.
Behind the scenes, NeverLapse:
- adds a TXT record
_acme-challenge.<your domain>through GoDaddy's API, - waits until GoDaddy's own name servers answer with it (up to 3 minutes),
- waits about a minute more so every DNS server Let's Encrypt might ask has caught up,
- asks Let's Encrypt to check the record and issue the certificate,
- removes the TXT record again.
In this example the whole run took 93 seconds.
6. The certificate is issued
The row turns Healthy with an expiry date about 90 days out, and a line saying it was issued by Let's Encrypt and where the files are.
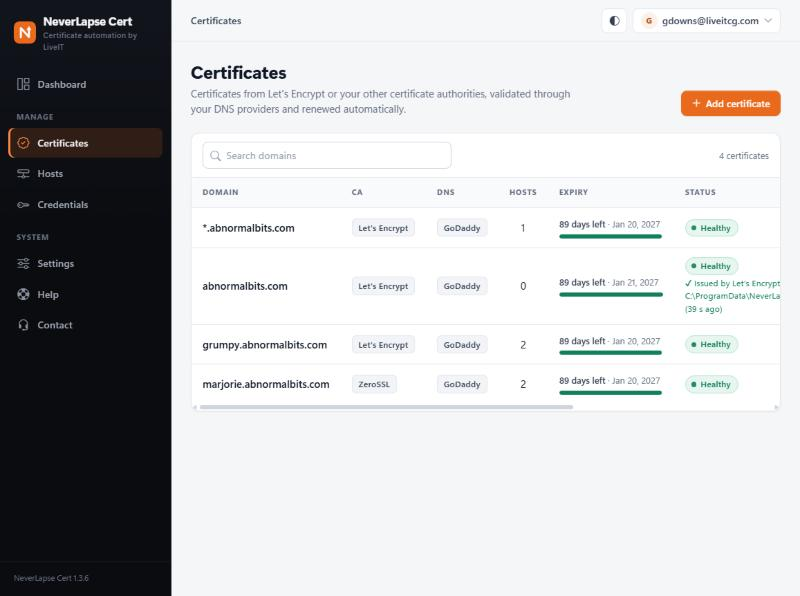
The files are in C:\ProgramData\NeverLapse\Certs\<domain>\ on the NeverLapse server:
cert.pfx: certificate and private key for Windows (its password is kept under Credentials),cert.pem,chain.pem,fullchain.pem,privkey.pem: the same in PEM files for Linux software,haproxy.pem: certificate, chain and key in one file, the way HAProxy wants it.
You rarely need these files yourself. Add the servers that use the certificate as Hosts and NeverLapse puts it on them after every renewal (see What next).
7. The saved GoDaddy account
The token is saved under Credentials as a GoDaddy account, under the name you gave it.
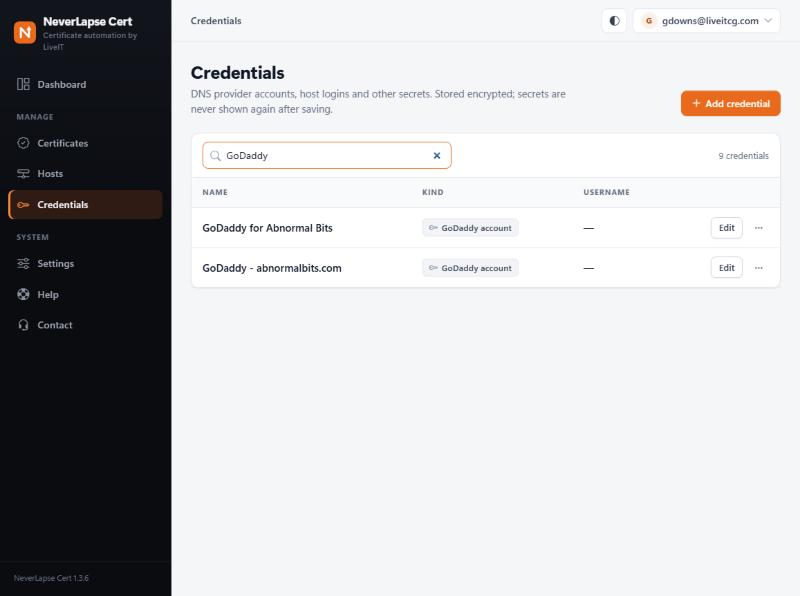
When the token expires
GoDaddy tokens expire on the date you picked in step 1. After that, renewals fail at the DNS step and NeverLapse tells you on the Certificates page and in the failure email. Before it expires:
- Create a new token in GoDaddy (step 1).
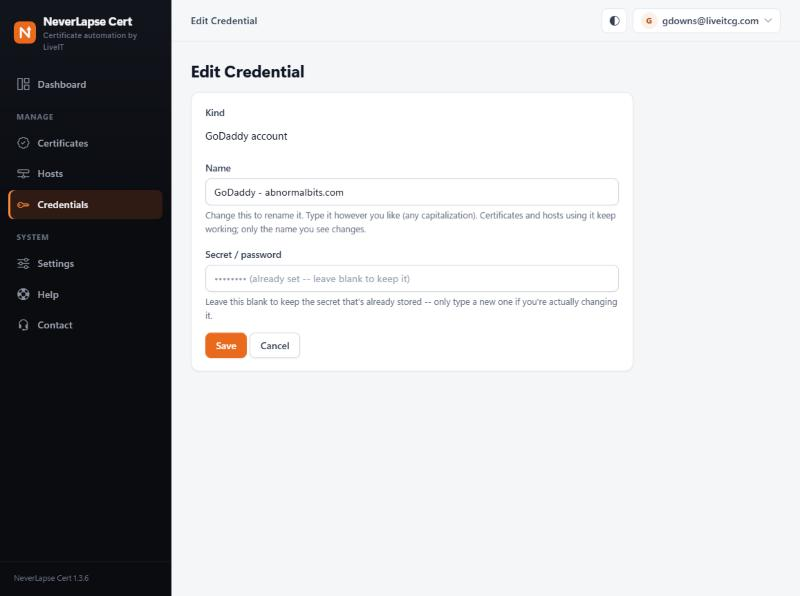
- In NeverLapse, open Credentials, click Edit on the GoDaddy account, paste the new token into Secret / password and click Save.
Every certificate using that account picks up the new token. Leaving the box blank keeps the old token.
Renewals
- NeverLapse checks every night (02:00 by default) and renews a certificate when it has 30 days or less left. Change either under Settings > Renewal. Renewal goes through the same GoDaddy steps with no clicks from you.
- To hear about problems, set an address under Settings > Certificate issuance notifications. You can also get an email after every renewal.
If it doesn't work
The reason shows on the certificate's row on the Certificates page.
- "GoDaddy API create TXT record failed (401)" or "(403)": the token is wrong or expired, lacks the
domains.dns:updatescope, or belongs to a GoDaddy account that doesn't own this domain. Make a new token with the account that owns the domain and replace it under Credentials. - Any other GoDaddy error (for example 404): often the zone name is wrong, or the domain's DNS isn't hosted at GoDaddy. Check the Zone field and the domain's name servers.
- The DNS check times out: GoDaddy didn't publish the record within 3 minutes. That's rare; click Issue now again.
- Let's Encrypt says the record is wrong or missing: usually a second DNS provider for the same domain, or name servers that changed recently. Make sure the domain's name servers are GoDaddy's.
More on DNS providers: GoDaddy. More on certificates: Certificates.
What next
Put the certificate on the servers that need it: add each one under Hosts. For a Windows IIS website, follow the IIS walkthrough. For other servers, see Hosts.